Automate User Access Management through Jenkins scripted Pipeline
Authentication and Authorisation are the two vital components of any organisation to secure the data. Both plays the vital role in security system. So first we will understand what is authentication and authorisation
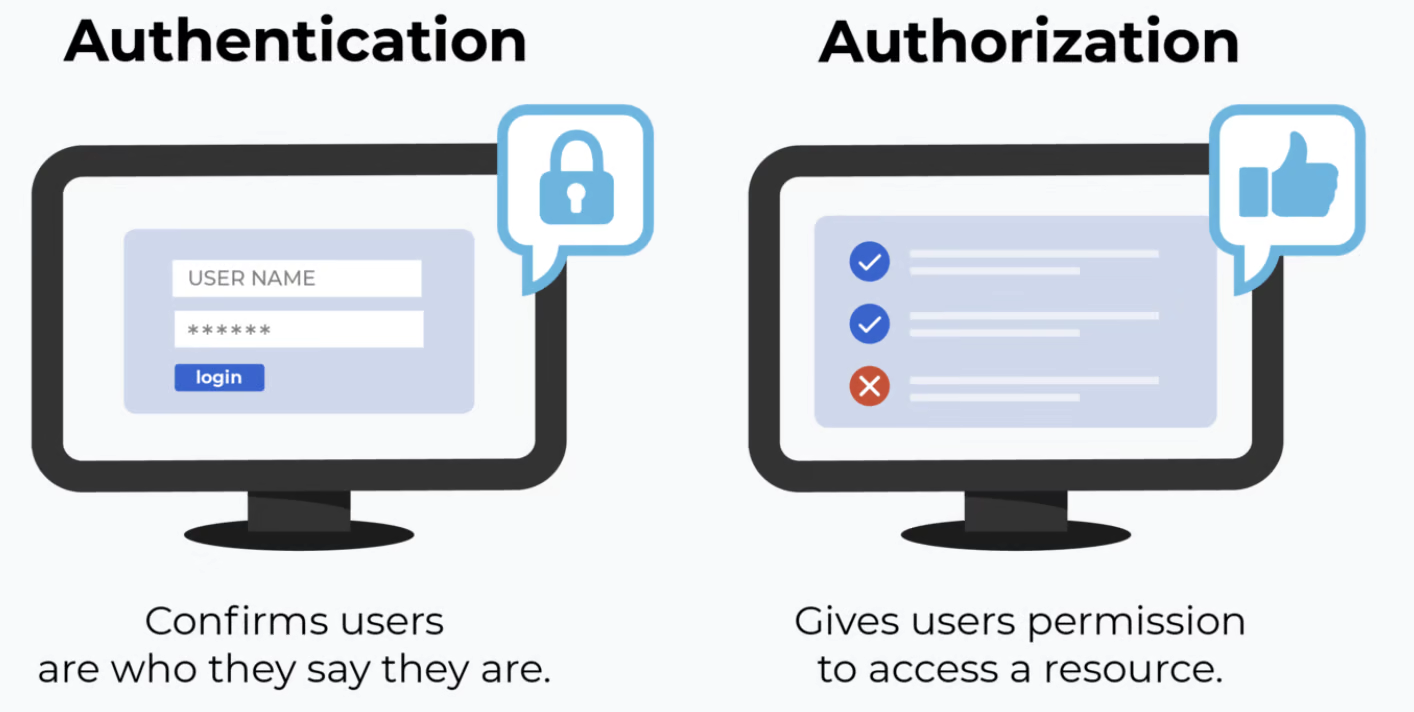
Authentication: This is the very first step of any security process. Authentication is the act of validating the users are whom they claim to be. E.g. username password, biometrics, OTP etc.
Authorisation: It is the process of giving permission to access on any resource or function. E.g., we will take the example of an office, Entering in to office with card or biometric is an authentication, that you are allowed to enter into the office and there is a cabin and a laptop is placed there, so do you have permission to work on that laptop this is an authorisation.
As we discussed above that how both authentication and authorisation is so important part for an organization. Toggling with the servers and their services is never a daunting tasks until no of servers are less. Deriving from this wholesome of activities have to perform every time, which is clearly repetitive and hectic for a job. Luckily there is a tool to rescue from this picture.
In this blog we will automate the process of giving access to any user on Linux machine.
Let’s start with Explanation of Scripted Pipeline
node{
    wrap([$class: 'TimestamperBuildWrapper']) {
1. We are Initializing with node block.
2. We are giving time stamper class to give time on the build console.
  properties([
    parameters([string(defaultValue: 'ec2-user',
    description: 'Enter the username', name: 'user_name', trim: false),
    choice(choices: ['General_Access', 'Dev_Team', 'Infra_Team'],
    description: 'Select the level of Access', name: 'access_type'),
    string(defaultValue: '',  description: 'Enter the IP(s) of the user', name: 'ip_address',
    trim: false),
    string(defaultValue: '',  description: 'Enter the key of the user', name: 'key',
    trim: false)])
  ])
In this block of code we are taking the parameters to take the input from the user before build.
1. String parameter: To take username.
2. Choice parameter: In choice parameter we are taking the level of access we want to provide to the user.
3. String parameter: To take IP addresses. Do not give space between IP's eg. (10.1.1.1,10.1.1.2)
4. String parameter: To take user’s public key.
def ip = params.ip_address.split(',')Here we are defining a variable name “ip” to calculate the no of IP’s provided in IP address parameter and it is separating or splitting it with (comma).
  stage('User_Access_Permission'){
    cleanWs()
    if("${params.access_type}" == 'Infra_Team'){
        echo "${params.access_type}"
        for(int i = 0; i < ip.length; i++){
            script{
                sh """
                    ssh -tt -o StrictHostKeyChecking=no ec2-user@"${ip[i]}" << EOF
                    sudo su
                    useradd "$user_name"
                    cd /home/"$user_name"
                    mkdir .ssh
                    cd .ssh
                    echo "$key" >> authorized_keys
                    chmod 400 authorized_keys
                    cd ..
                    chown -R "$user_name":"$user_name" .ssh
                    usermod -aG admins "$use
                    exit
                    exit
                    EOF
                    """
            }
        }
    }
From here our stage starts first we are giving the name of the stage:
1. Cleaning the workspace.
2. Giving the “if” condition to check which level of access want to provide.
3. Checking the length (no. of IP’s) through for loop.
4. Taking access of remote server through SSH.
5. Creating user and providing the access according to access level selected.
In the above code we have provided the code with three type of access.
1. General Access: In this type we will only creating the user and there is no sudo or special permission will be provided to user.
2. Infra: In this type we will give the user full sudo access by adding user to admin group.
3. Dev: In this type we will give the dev user limited or required access by adding to dev group.

Photo by Unsplash
Complete Pipeline code for your reference:
node{
  wrap([$class: 'TimestamperBuildWrapper']) {
      properties([parameters([string(defaultValue: 'ec2-user',
      description: 'Enter the username', name: 'user_name', trim: false),
      choice(choices: ['General_Access', 'Dev_Team', 'Infra_Team'],
      description: 'Select the level of Access', name: 'access_type'),
      string(defaultValue: '',  description: 'Enter the IP(s) of the user', name: 'ip_address', trim: false),
      string(defaultValue: '',  description: 'Enter the key of the user', name: 'key', trim: false)])])
      def ip = params.ip_address.split(',')
      stage('User_Access_Permission'){
          cleanWs()
          if("${params.access_type}" == 'Infra_Team'){
              echo "${params.access_type}"
              for(int i = 0; i < ip.length; i++){
                  script{
                      sh """
                          ssh -tt -o StrictHostKeyChecking=no ec2-user@"${ip[i]}" << EOF
                          sudo su
                          useradd "$user_name"
                          cd /home/"$user_name"
                          mkdir .ssh
                          cd .ssh
                          echo "$key" >> authorized_keys
                          chmod 400 authorized_keys
                          cd ..
                          chown -R "$user_name":"$user_name" .ssh
                          usermod -aG admins "$user_name"
                          exit
                          exit
                          EOF
                          """
                  }
              }
          }
          else
          if("${params.access_type}" == 'General_Access'){
              echo "${params.access_type}"
              for(int i = 0; i <= ip.length; i++){
                  script{
                      sh """
                          ssh -tt -o StrictHostKeyChecking=no ec2-user@"${ip[i]}" << EOF
                          sudo su
                          useradd "$user_name"
                          cd /home/"$user_name"
                          mkdir .ssh
                          cd .ssh
                          echo "$key" >> authorized_keys
                          chmod 400 authorized_keys
                          cd ..
                          chown -R "$user_name":"$user_name" .ssh
                          exit
                          exit
                          EOF
                          """
                  }
              }
          }
          else
          if("${params.access_type}" == 'Dev_Team'){
              echo "${params.access_type}"
              for(int i = 0; i <= ip.length; i++){
                  script{
                      sh """
                          ssh -tt -o StrictHostKeyChecking=no ec2-user@"${ip[i]}" << EOF
                          sudo su
                          useradd "$user_name"
                          cd /home/"$user_name"
                          mkdir .ssh
                          cd .ssh
                          echo "$key" >> authorized_keys
                          chmod 400 authorized_keys
                          cd ..
                          chown -R "$user_name":"$user_name" .ssh
                          usermod -aG dev "$user_name"
                          exit
                          exit
                          EOF
                          """
                  }
              }
          }
      }
   }
}
That's it for this blog guys. I hope you get something knowlegeable from this blog. If you have any questions feel free to ask in comment section.
